
Saturday, January 30, 2010
box
This is an ideal way to recycle old greeting cards or wedding cards.

Both the boxes are made from square sheets with the square to make the inner box slightly smaller than the sheet to make the outer box ,so that it fits.

I have taught this box to summer class students and also to lot of my students I have made a lot of these boxes over the years to box small gifts for my friends.
To make this box, take two square pieces of paper the paper for the outer box should be slightly bigger than the inner one. I have used an old wedding card ,I have made sure that the picture is at the center of the paper.
Turn the paper around and find the center .

Fold one edge of the square to touch the center.

Fold again the folded part as shown below.

Unfold ,

Repeat on all four sides,

You can see a triangle on each edge of the square.Now make a cut starting from the base of the triangle
until you reach the large square in the center(where I have marked ) on two opposite sides.

Fold the uncut edges along the folds that we have made earlier in such a way that the triangle lies flat on the square in the middle , Stick the triangles with glue to hold it in place.

Now fold the cut edges over as shown.

Stick the triangles of the cut edges too on the square at the center.

The picture is at the center of the box. This will be the outer box. Now repeat the same procedure for the inner box .

origami-lotus

The lotus looks so beautiful and the picture looks perfect. Here's a neat tutorial for the origami lotus.
Friday, January 29, 2010

Thursday, January 28, 2010
origami-ring
 This I have made taking papers from a magazine.
 I first saw this ring in folding trees and then found this tutorial there.
Wednesday, January 27, 2010


Monday, January 25, 2010
paper flowers
 http://www.craftstylish.com/item/49153/how-to-make-elegant-parchment-flowers-with-jeffrey-rudell
I have made these flowers with thick white paper, These flower look more elegant when parchment paper is used.
Saturday, January 23, 2010
can't stop quilling
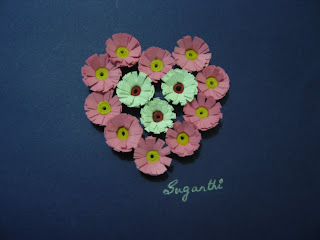
 Akhil thinks it looks like my earlier flowers , I think its a little bit different.
Friday, January 22, 2010
tissue paper carnations.

quilled roses

This seems to be my tenth post on quilling , yet I am not able to get quilling paper anywhere.
I have used yellow and pink chart paper to make these roses.
These flowers are made by alternately winding and folding a 1cm width paper around the needle
Thursday, January 21, 2010
quilled roses

These roses were too easy to make. But very beautiful.
I found this wonderful site which has wonderful tutorials. Here is a tutorial for quilled roses. cut out a neat square, draw a spiral starting from the sides to the center, then you can use craft scissors to cut out the spiral or you can do what I did .I drew a wavy line along the spiral that I had drawn and cut along the wavy line.
start quilling the paper from the outer end to the middle and stick the end .
quilled lotus

I remember as a child I drew lotus somewhat like this.
I will think of some other flower for my next post.
I used the same length of paper for all the petals.
Wednesday, January 20, 2010
more flowers
 I tried making different kinds of flowers I could think of .
 I have used two strips black and white together to make the top left flower.
Tuesday, January 19, 2010
quilled flowers
 The center circle- 6 inches and 0.5cm width strip wound tight,
Fold paper of 6 inches length and 1.5 inches width, fold it lengthwise and cut along the fold at about 45 degrees through out the length of the strip( leaving 0.5cm).
wind it around the center till the end and stick the end, the fringes will unfurl to form beautiful flowers.
I found this tutorial here, http://increations.blogspot.com/2009/02/fringed-flowers-ii.html
Monday, January 18, 2010
quilled flowers
The center is a tight coil, for the outer circle take a strip of width about 1.5 cms in width.cut fringes along the length of the outer strip. Stick one end of the fringed strip to the tight coil and wind it tight and then stick it now press the fringes to form the flower.
width of center 0.5 cm.
I found a wonderful site with this tutorial here.
Saturday, January 16, 2010
quilled sun flowers

I have started with these beautiful sunflowers.
For the petals -2 inches.
Wednesday, January 13, 2010
HAPPY PONGAL-2010
 |
| Pongal pot |
Tuesday, January 5, 2010
3-D snowflake

I found this easy tutorial on wikihow to make a three dimensional snow flake, I though it a great idea for christmas decorationhttp://www.wikihow.com/Make-a-3D-Paper-Snowflake
Origami-kusudama

Christmas time and back home, I though I will surprise my mother by decorating her home.
Being so proud of my own kusudama at home, I wanted to make one for her.Before I left Chennai
I had cut papers of 12cm squares and I thought I had 60 squares for 60 petals , but once I started to make the flowers I found at least 12 short in each colour( orange and blue) so I cut up some magazine covers and wrapping paper to make the rest of the flowers.
It looked good hanging from the ceiling .Detailed tutorial is available here-http://foldingtrees.com/2008/11/kusudama-tutorial-part-1/
Subscribe to:
Posts (Atom)